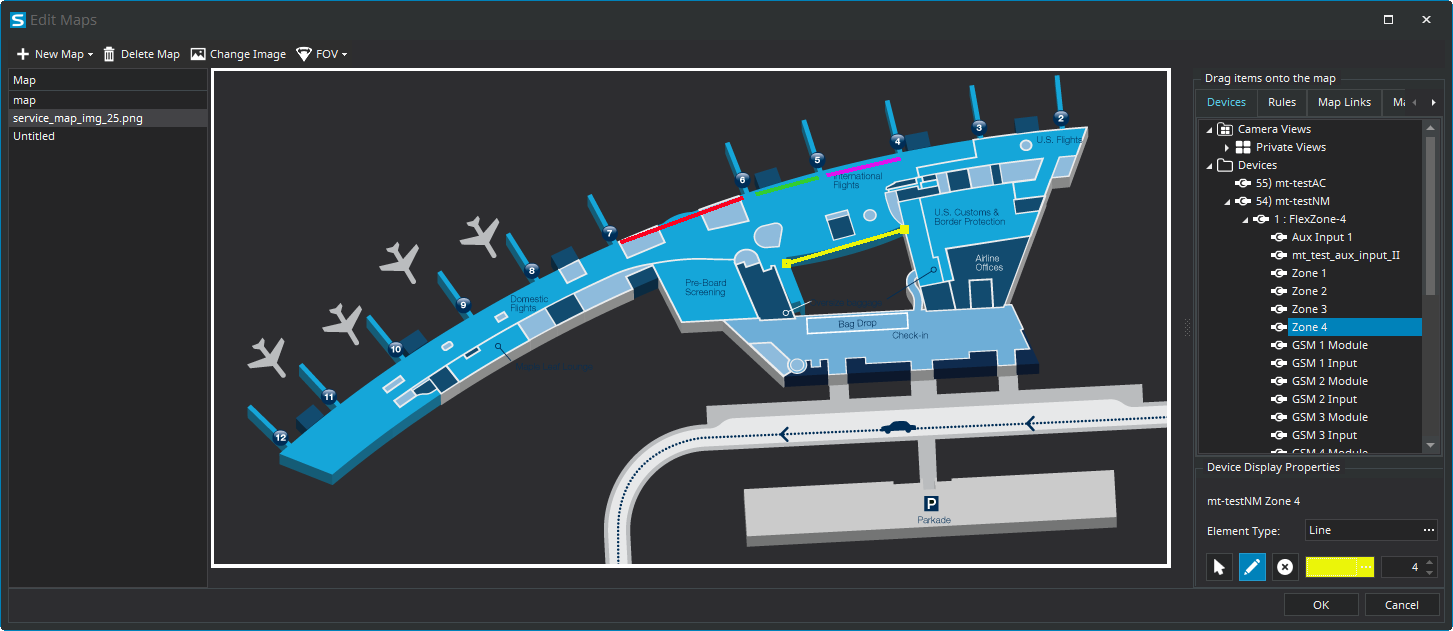
Add a zone to a map
You can add an alarm zone for hardware nodes to a map.
A zone appears as a line on the map. You can set the position, color, and thickness of the line. In addition, you can add multiple segments to the line to accurately represent the location of the hardware node on the map.
When the hardware node experiences an event, the zone on the map displays an alarm icon.

- In the Senstar Symphony Client interface, click .
- Select a map.
- Click the Devices tab.
- Drag a hardware node on to the map.
- Click the icon for the hardware node.
-
In the Element Type field, click the ellipsis and click Line.
The icon changes to a line.
-
To change the line, perform any of the following tasks:
- To change the color of the line, select the line, click the ellipsis in the color field, select a new color, and click OK.
- To change the thickness of the line, select the line, click the up or down arrows in the thickness field.
- To change the position or size of the line, click and hold the endpoint of the line and move it to the new location.
-
To add a segment to the zone, perform the following tasks:
-
To remove a segment from the zone, perform the following tasks:
- Click OK.
