Export video to the cloud
You can export video from the Senstar Symphony Client to the cloud and with a link to download the video.
The Senstar Symphony Client uploads the video files to the Senstar Xnet and sends an email with a link to download the video files to the email address associated with your Senstar Symphony user account. You can then forward the link to other recipients.
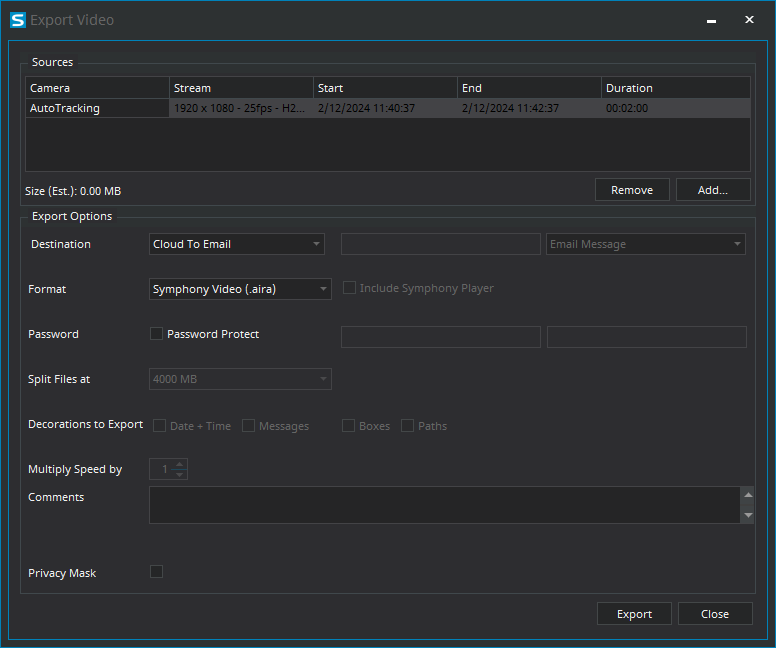
When exporting video to the cloud, the Senstar Symphony Client splits the video into files with a maximum size of 4000 MBs, does not include decorations, and does not support increasing the speed of the video.

-
In the Senstar Symphony Client interface, perform one of the following tasks:
- Right-click the view panel and click Export to export video from the camera that is active in the view panel or Export All to export video from all of the cameras that are active in view panels.
- Hover over the view panel and click the Export icon.
- Right-click the timeline to mark the export start and export end, and click Export to export video from the camera that is active in the view panel or Export All to export video from all of the cameras that are active in view panels.
-
To add a camera stream to the export, perform the following tasks:
- Click Add.
- Select the camera and click Add.
- In the sources list, select the stream in the Stream column.
- If required, modify the start and end time for the export.
- In the Destination list, select Cloud To Email.
-
To add a custom email message to the email message, perform the following tasks:
- Click the Email Message field.
- In the text window, type the email message.
- Click OK.
-
To protect the video export files with a password, perform the following tasks:
- Select Password Protect.
- Type and confirm the password.
- In the Comments field, type any text that you want to include in the text file that is associated with the video export.
-
To add a privacy mask to video export, perform the following tasks:
- Select Privacy Mask.
- In the Privacy Mask pane, draw the privacy mask on the sample image.
- Click Export.
