Connect to Senstar Symphony Access Control
Connect the Senstar Symphony Server to the Senstar Symphony Access Control to use events from the Senstar Symphony Access Control to trigger actions.
- In the Senstar Symphony Server configuration interface, click .
- Click Add Hardware.
- In the Device Type list, select Symphony AC.
-
In the Name field, type a meaningful name for the Senstar Symphony Access Control.
This name will appear in the device list in the Senstar Symphony Server configuration interface and the device tree in the Senstar Symphony Client interface.
-
In the Database Server field, type the full address of the Microsoft SQL Server instance for the Senstar Symphony Access Control.
For example,
COMPUTER1\SQLEXPRESS2012. - In the Database Name field, type the name of the Senstar Symphony Access Control database.
- In the Username field, type the username that the Senstar Symphony Server uses to access the Senstar Symphony Access Control database.
- In the Password field, type the password that the Senstar Symphony Server uses to access the Senstar Symphony Access Control database.
- Click Connect to Device.
-
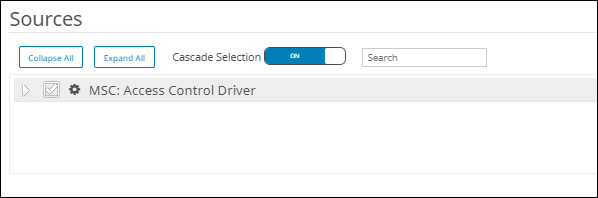
In the Sources list, select the nodes that you want to add to the Senstar Symphony Server.
If you want your selection to apply to all child nodes, click the Cascade Selection toggle switch to turn it on. To prevent your selection from affecting other nodes, click the Cascade Selection toggle switch to turn it off. To search for a node, type the terms in the Search field—the source list is filtered by the search terms.
- In the Groups list, select the device tree folder in which the Senstar Symphony Access Control appears.
- Click Save.