• (Optional) Set up the Camera Tour
• Calibrating Many Cameras of the Same Make and Model
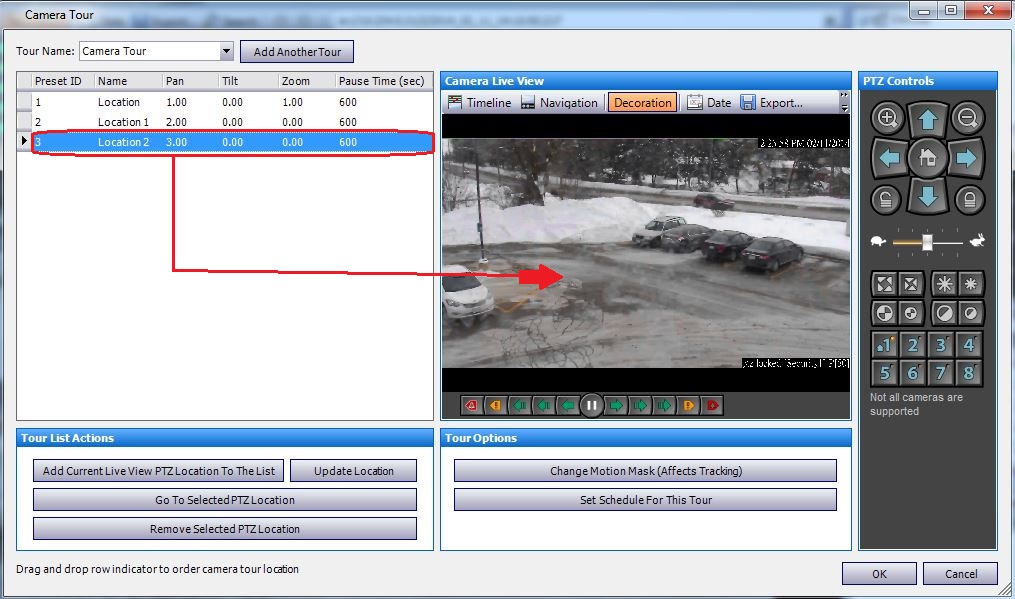
Task 1: (Optional) Set up the Camera Tour
1. In the Camera Tree, right-click on a PTZ camera. From the context menu, select Camera Tour. The Camera Tour dialog box opens.
2. Using the PTZ Controls, move the camera to where you want the Home position, and then click Add Current Live View PTZ Location to the List. This will be location 1 or Home.
3. Using the PTZ Controls, move the camera to where you want the second position, and then click Add Current Live View PTZ Location to the List. This will be Location 2.
4. Using the PTZ Controls, move the camera to each location you need for a tour, clicking Add Current Live View PTZ Location to the List each time. You can set up 8 locations (stops) on the camera tour.
5. For each location, you can define the amount of time in seconds that the camera pauses in that location. Enter the amount in seconds, for example, for a pause of 10 minutes you enter 600 seconds in the Pause Time field.
6. You can define a schedule for when the camera tour should be active. Click Set Schedule for this Tour. The Schedule dialog box opens. By default, the entire date/time chart is red, indicating Active.
7. By default, the Inactive option is selected. Using your mouse, click on the date and time intervals you want the Camera Tour to be inactive (green) and click OK.
8. Make any adjustments as necessary to your tour and click OK.
Task 2: Calibrate the PTZ Camera
You must use a calibrated camera in order to use the PT091 Analytic Engine.
• Aimetis has a list of pre-calibrated cameras.
• For uncalibrated absolute PTZ cameras, you must use the PTZ Calibration feature in Symphony:
• The process may take up to 10 minutes
• The calibration data for a camera is stored in the database and overrides any pre-calibrated data
• If you have many absolute PTZ cameras of the same model, you can calibrate one and then save and apply the settings to other cameras of this model
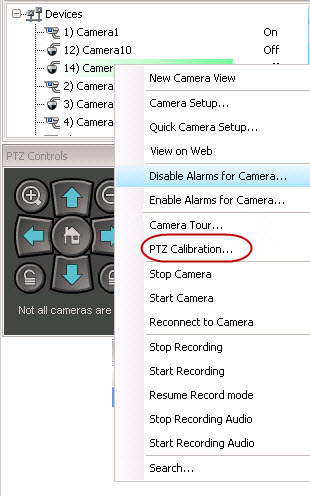
1. In the Camera Tree, right-click on the PTZ camera and select PTZ Calibration from the context-menu.
2. In the PTZ Calibration dialog box, click Start Calibration. The camera will run through a series of pans, tilts, and zooms.
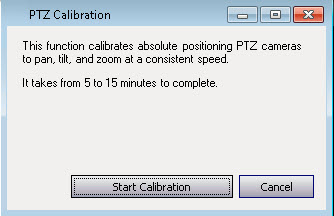
3. In the Calibration Complete dialog box, click OK.
To configure the PT091:
1. In Symphony Client, from the Server menu, select Configuration. The Configuration dialog box opens. This allows you to configure devices for the currently selected server.
2. In the left pane, click Devices. The Devices dialog box opens.
3. Click the camera you want to configure for use with video analytics and click Edit.
4. Click the Analytics Engines tab and select PT091. By default VE250 is selected.
The PT091 cannot be used by itself, since it is only used when auto-tracking has started. Typically the VE250 analytic is also configured on the camera. |
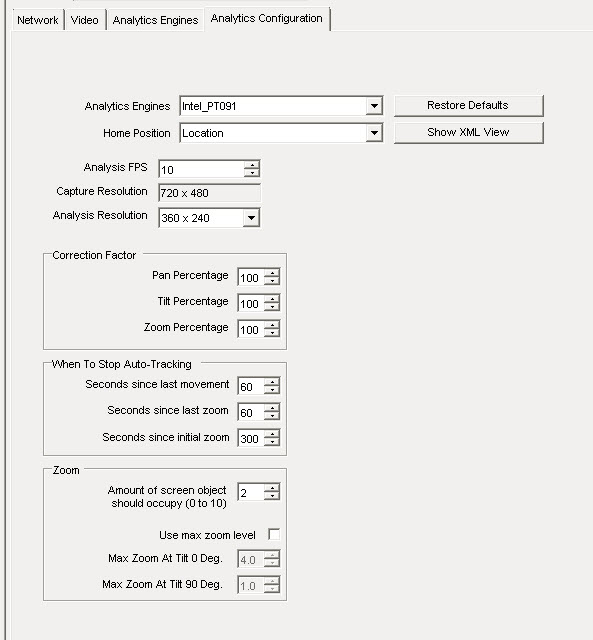
5. Configure the camera to also use the PT091. Click the Analytics Configuration tab. From the Analytic Engines drop-down field, select Intel_ PT091. We recommend that you keep all default settings.
6. Click OK to save settings.
Option |
Description |
Default |
When to use |
Analysis FPS |
Indicates how many frames will be analyzed by the system. |
10 |
Typically the default value should not be altered. To conserve CPU resources, you can lower the setting, but this may negatively alter the video engine performance. |
Capture Resolution |
Displays the resolution at which the video is recorded. This can be changed only in the Device setup. |
|
Not applicable. |
Analysis Resolution |
Resolution that is used to analyze frames. Normally this is lower than Capture Resolution to conserve CPU.
|
|
Setting the Analysis Resolution to the same value as Capture Resolution ensures that objects will be detected as far away as possible. To conserve CPU resources, you can lower the setting, but this may reduce the detection range of the video analytic. |
Pan Percentage |
Enhances or dampens the control of the video engine. |
100 |
If the camera overshoots or appears to be jumping a scene, reduce the percentage to ensure more stable tracking. Increase the percentage if it is too slow. |
Tilt Percentage |
Enhances or dampens the control of the video engine. |
100 |
If the camera overshoots or appears to be jumping a scene, reduce the percentage to ensure more stable tracking. Increase the percentage if it is too slow. |
Enhances or dampens the control of the video engine. |
100 |
If the camera overshoots or appears to be jumping a scene, reduce the percentage to ensure more stable tracking. Increase the percentage if it is too slow. Minimum zoom percentage for PT091 is 0. Set to 0 if you want auto-tracking to NOT zoom camera. |
|
Seconds since last movement |
Returns to the camera to home position after indicated seconds. |
15 |
When the camera is not panning or tilting, and does not see anything moving anymore, it will return back home after 15 seconds (default). |
Seconds since last zoom |
Returns to the camera to home position after indicated seconds. |
60 |
If the camera has been moving but not zooming, that is, it is caught on some small background movement. |
Seconds since initial zoom |
Returns to the camera to home position after indicated seconds. |
150 |
The camera will return after this many seconds, no matter what it sees. For example, it has been tracking cars on the road. |
Amount of screen object should occupy (0-10) |
• The video engine is trying to maintain the target as a certain fraction of the screen in width and height. • 0 corresponds to 25% of the screen. • 5 corresponds to 35% of the screen. • 10 corresponds to 45% of the screen. |
|
Use a low value if you want to maintain more of a sense of the object’s surroundings and want to minimize chances of losing the object. Use a high value if you want to zoom in close to better recognize the object, though this increases the risk of losing track. |
Use Max Zoom Level |
This sets the maximum zoom level possible for a given tilt angle. Note: This does not mean you will reach this zoom level during tracking; it just guarantees you will never exceed this zoom level. |
Disabled because the max zoom level depends on where the camera is placed.
|
If you notice that the camera is zooming too much when tracking objects, use this feature to limit the max zoom. Limiting the max zoom can improve tracking at time. |
Max Zoom At Tilt 0 Deg |
When the tilt is 0 degrees you are looking into the horizon, so the distance between the camera and the object being viewed is large; a large zoom level is needed here. |
10 |
If the video engine is zooming in too much when looking towards the horizon, then set zoom level appropriate to clearly see objects at the maximum distance you want to track them. |
Max Zoom At Tilt 90 Deg |
When the tilt angle is 90 degrees the camera is looking directly down, so the distance from the camera to the object being viewed is small (height of camera); a small zoom level is needed here. |
1 |
Set to the zoom level appropriate to clearly see an object directly beneath the camera. |
Task 4: Creating a Rule using PT091
For illustrative purposes, a rule is created to zoom and follow objects that enter an alarm zone. You may set up many different kinds of rules.
To configure a Rule using the PT091:
1. You must configure the PT091 before creating a Rule that uses the PT091.
2. From the Server menu, select Configuration and then Rules.
3. Click New. The Rule Wizard opens. Read the overview and click Next.
4. Select the check box next to the camera name. If it is a PTZ camera, select the camera tour position check box.
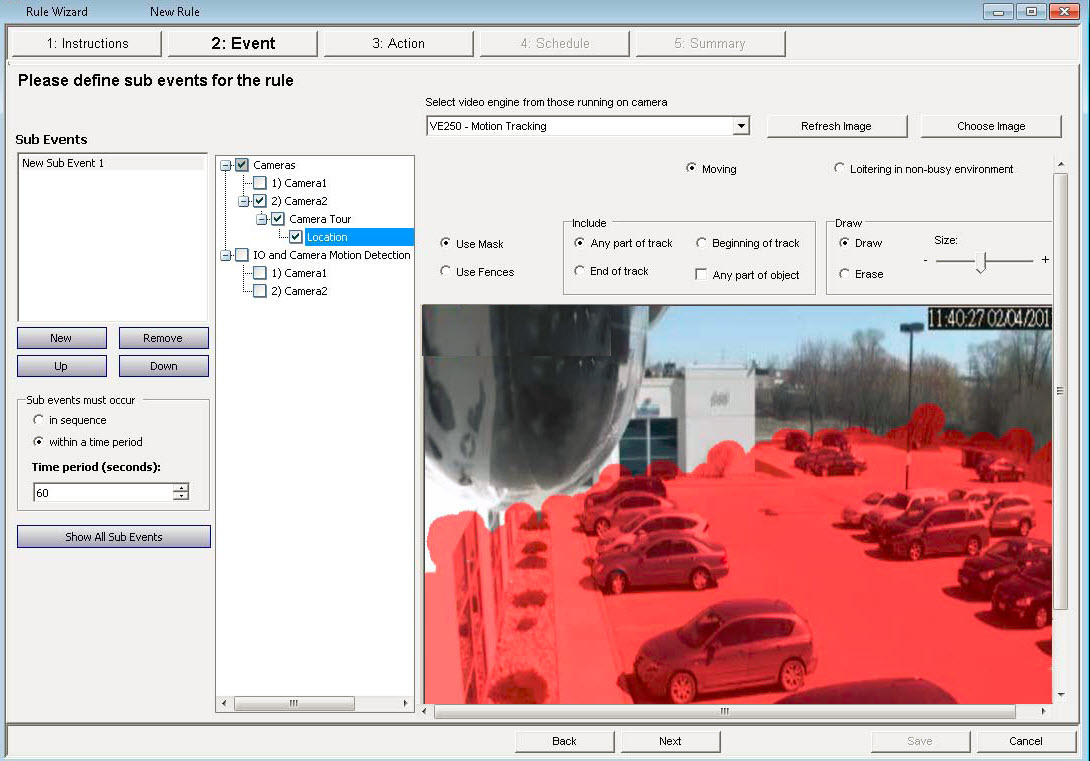
5. From the Select video engine for those running on camera drop-down list, select VE250. (The engine should be the one you chose in Configure PT091.)
6. Select the Draw option and using your mouse paint the area in the image that you want to define as the alarm zone. If objects enter this area, the camera will zoom in and follow the objects.
7. Click Next to continue in the Rule Wizard. In the Event screen, Alarm tab, ensure that the Raise Alarm check box is selected.
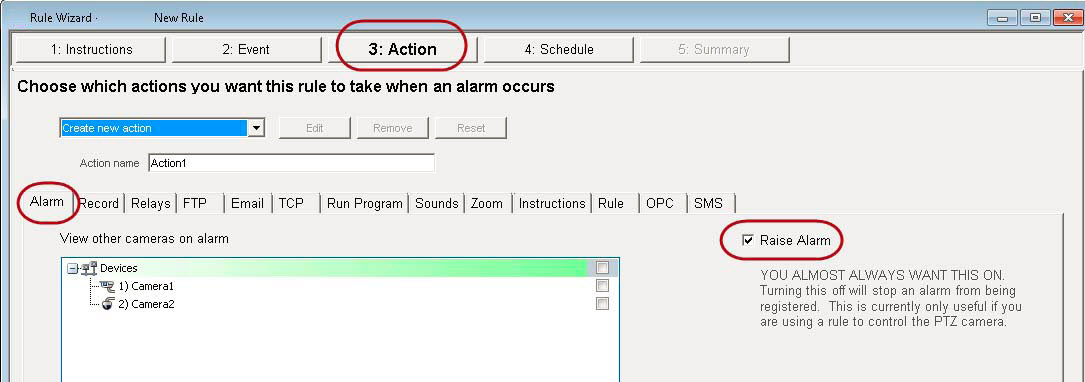
8. Click the Zoom tab. Select the Auto-tracking check box. (The camera will zoom in on an object in an alarm zone and track the object.)
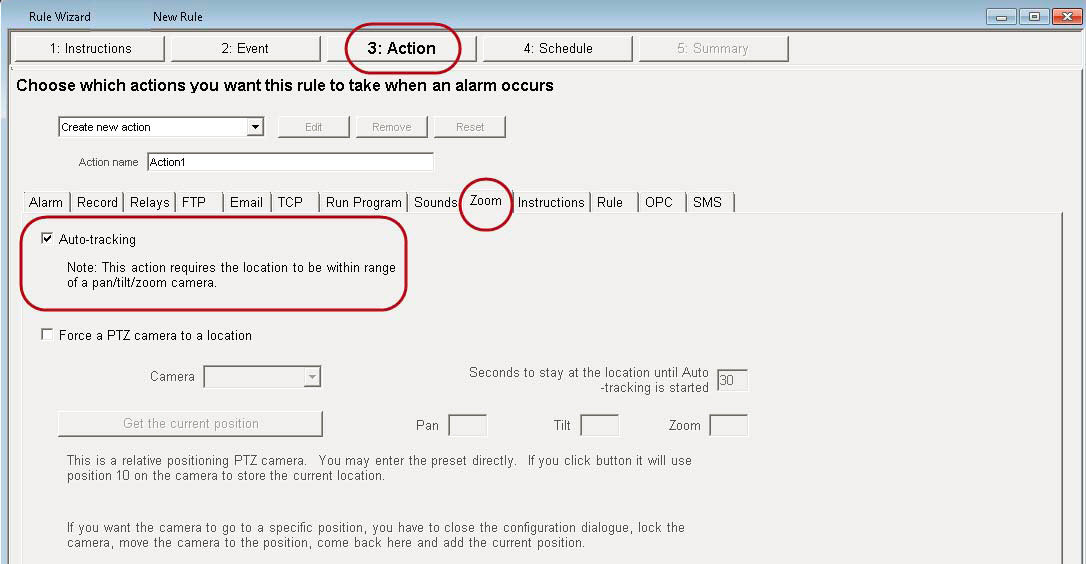
9. Click Next and set up a Schedule as necessary.
10. Click the Summary tab and give this rule a name, for example, Object in Parking Lot.