Hardware Manager- Bosch-B426-DefaultProcedure
Bosch- B426- Default Procedure
Below are instructions on how to reset a B426 card to default values. For example, you may wish to reset the B426 card to default value if you do not know the IP address.
- Power down the B426 card for at least thirty (30) seconds.
- On the B426 card, move the jumper from the Place Holder connector to the MODE connector and set the Address Dial to (9). (See Figure 1)
Figure 1 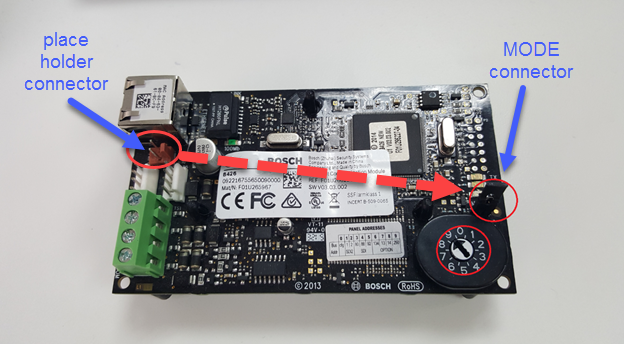
3. Set the computer to obtain an IP Automatically by completing the following:
a. Navigate to the network and sharing center. (See Figure 2)
Figure 2 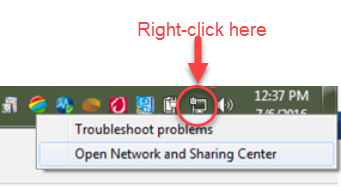
b. Click on “Change adapter settings”. (See Figure 3)
Figure 3 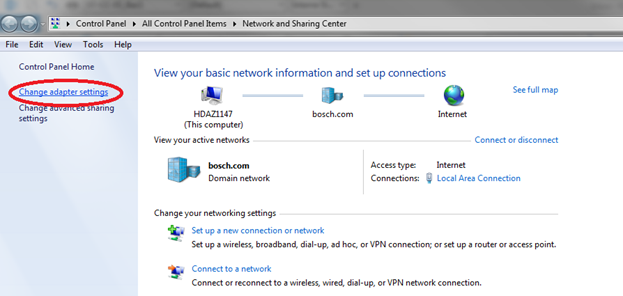
c. Select and right-click on the Local Area Connection. Select “Properties” (See Figure 4)
Figure 4 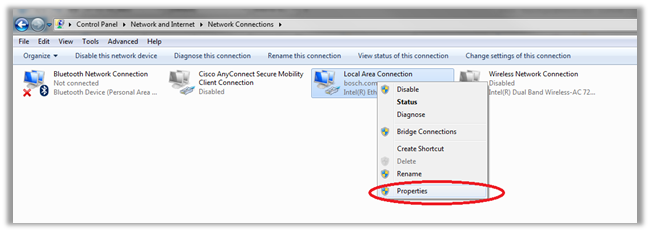
d. In the Local Area Connection Properties window, select the “Internet Protocol Version 4 (TCP/IPV4)” and click the “Properties” button. (See Figure 5)
Figure 5 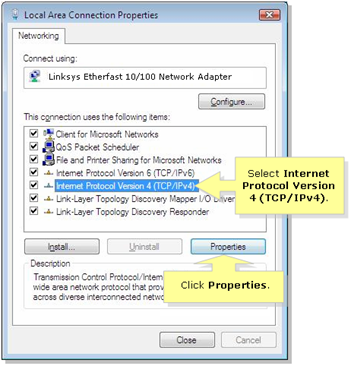
e. In the Internet Protocol (TCP/IP) properties window, select “Obtain an IP address automatically” and select “Obtain DNS server address automatically”. Click “OK”. (See Figure 6)
Figure 6 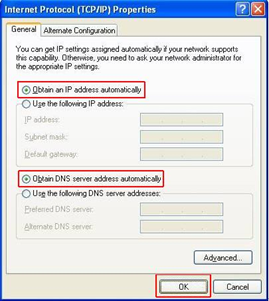
4. Connect patch cable or cross over cable from the computer to the B426 Card. (See Figure 7)
Figure 7 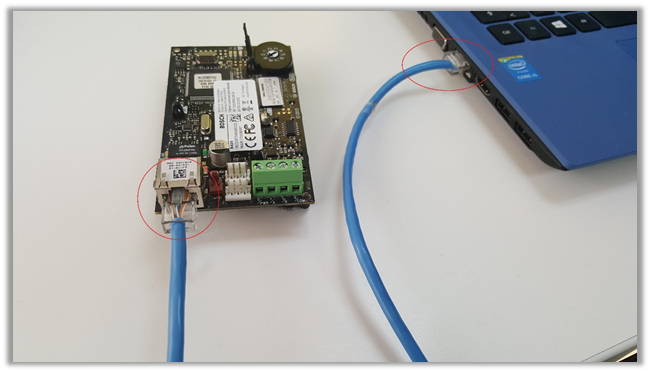
5. Power on the B426 Card.
6. Wait at least one (1) minute for your computer to get an IP address of 169.254.xxx.xxx .
7. Open a web browser and type the following on the address bar: 169.254.1.1 (See Figure 8)
Figure 8 
8. A Login screen should appear. Enter the following password: B42V2. (See Figure 9)
Figure 9 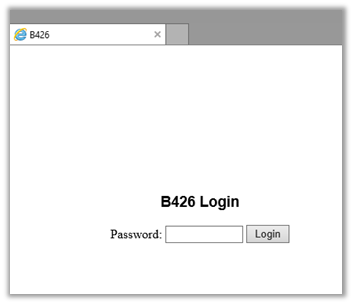
9. Make any necessary changes in the Basic Network Settings menu. (See Figure 10)
Figure 10 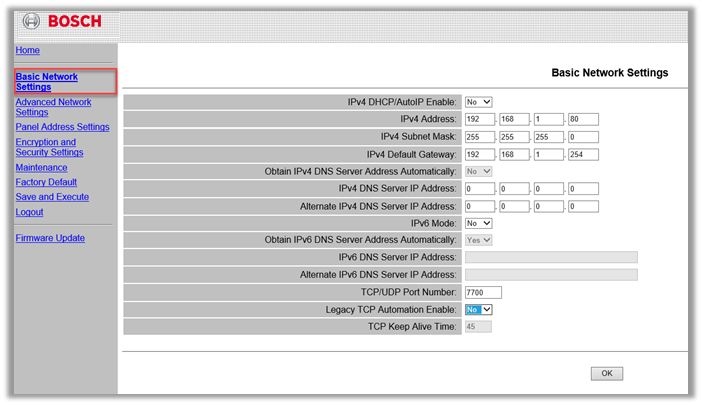
10. When you are finished making the changes, click “Save and Execute”. A notification will open, click “OK”. (See Figure 11)
Figure 11 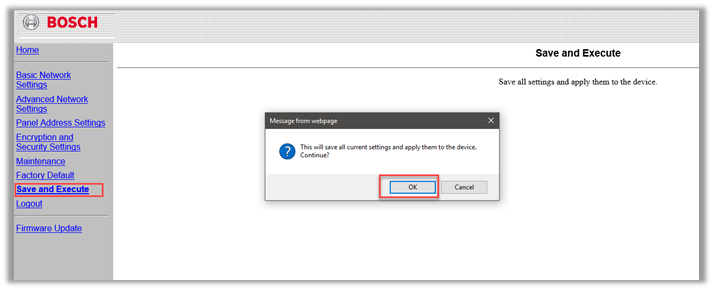
11. Power down the B426 Card for at least thirty (30) seconds.
12. Remove the jumper from the MODE connector and put it back on the place holder.
13. Set the Address Dial to the desired address and connect the Bosch controller to the B426 Card.
14. Plug the B426 Card to the network and power it on. (See Figure 12)
Figure 12 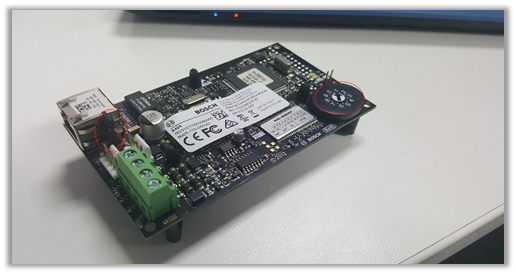
Copyright © 2020 by Senstar Corporation. All Rights Reserved.