Aero- Anti-Passback
What is Anti-Passback?
Local Anti-Passback: When Anti-Passback in enabled, the Aero controller and all readers connected to the controller/sub-controllers are aware of the cardholder’s whereabouts. When an access granted event is generated, the user is moved into the “Area” where the reader has been assigned to. That person can then present their card to any reader from the next “Area”, but cannot present it again to the same reader. By preventing the card from being used on the same reader, once a person enters the area, they cannot pass their card back to someone else to gain access on the same reader. Global Anti-Passback: Global Anti-Passback functions the same as Anti-Passback, with the exception that ALL Aero controllers/sub-controllers and readers within the system are notified of the whereabouts of a person by the driver which acts as a hub for the controllers. Controllers must be communicating at ALL times with Symphony AC. Global Anti-Passback is available using the same hardware platform. If the system is utilizing multiple hardware platforms, Anti-Passback will only be available between hardware of the same type.
I. Configuring Anti-Passback in Symphony AC
- Start Symphony AC.
- Click on the “Access” module and select “Occupancy Control”. (See Figure 1)
Figure 1 
- The “Access Areas” window will open. Complete steps a through c for every “Area” that will be used.
a. In the “Access Areas” dropdown menu, select the controller that has the readers where Anti-Passback will be configured.
b. In the “Access Areas” pane, click on an “Area” that will be used.
c. In the “Properties” pane, rename the area by editing the “Description” field. Do not change any other properties. (See Figure 2) Close the window when finished.
Figure 2 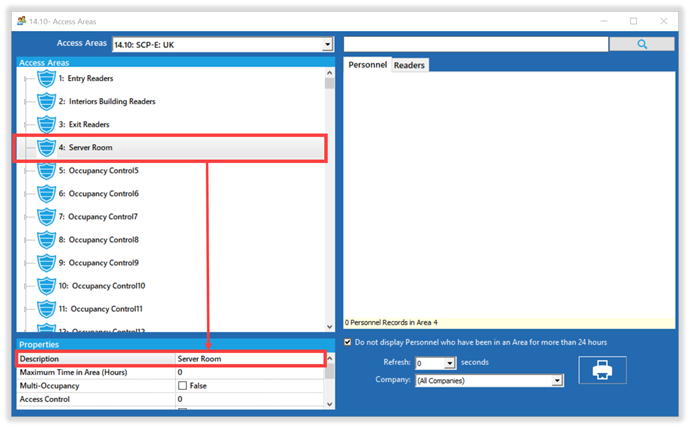
- Navigate to Hardware Manager and unlock the module. (See Figure 3)
Figure 3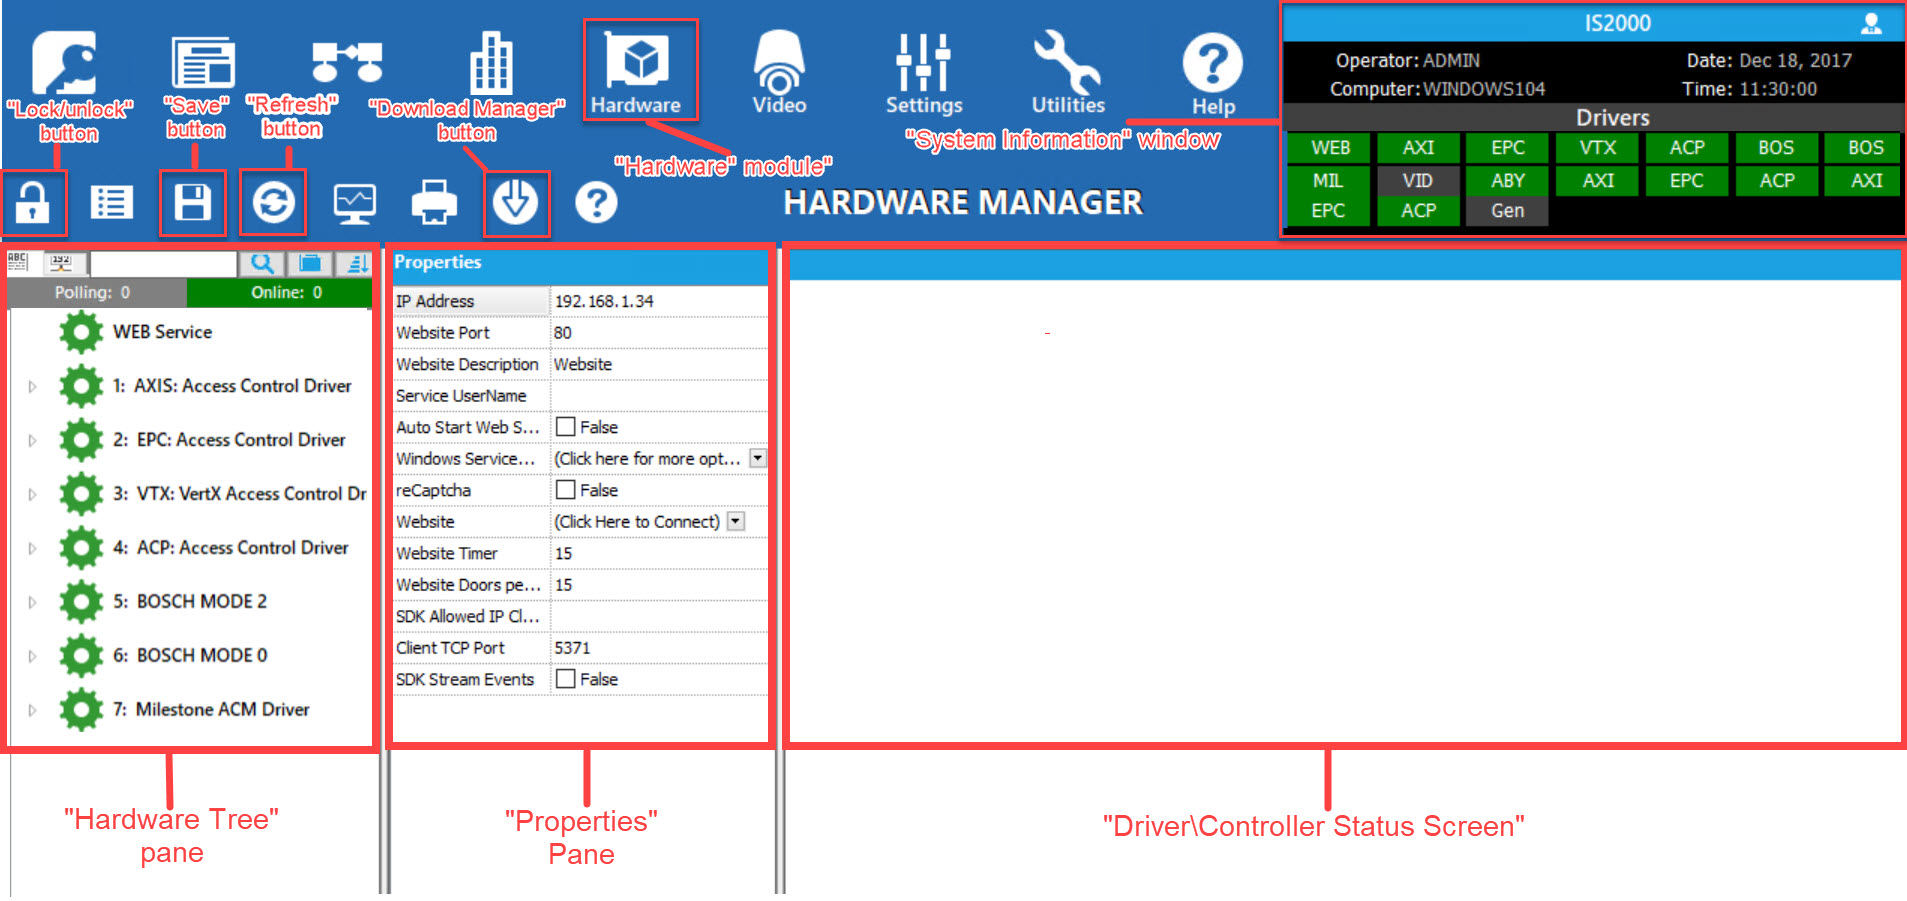
- Expand the hardware tree list down to the reader where Anti-Passback configured. (See Figure 4)
Figure 4 
- In the properties pane, click on the “Anti-Passback” field and the “Anti-Passback” window will open. (See Figure 5)
Figure 5 
- In the “Anti-Passback” window, complete the following:
a. Please Select an Anti-Passback Option: (Select one of the following)
0 – OFF (Do not check or alter Anti-Passback area number on entry): This option is used when no Anti-Passback is present and is the default installed mode.
1- Soft Anti-Passback (Do not check area number and change on entry): This option is used to move the card holder from one area to another without altering the Anti-Passback area number. This option will not prevent a card holder from entering the same area twice, but will alert the administrator that a Passback violation has occurred.
2 –Hard Anti-Passback (Check area number and change on entry): This option verifies the last area of the card holder to ensure that the card holder has not presented to the same reader twice. The card holder must present to designated readers and be granted access in sequence to avoid a Passback violation.
3 – Check this reader’s last valid user: This option is used in conjunction with Occupancy control. This option verifies the card holder was given an Access Granted prior to moving the card holder into the new area.
4 – Check user’s last reader used, no area number change: This option ensures the card holder was granted access to the reader where the card holder currently resides prior to allowing access into the next area. With this option, the area number will not be changed on entry.
5 – Check user’s current area number and change on entry: This option verifies the card holder’s current area to ensure presentation of the card has been done sequentially prior to giving an access granted event. Once an access granted has been achieved, the card holder will then be moved into the area upon entry. This option is also used in combination with Occupancy Control.
b. Entry Area:
This designates the area number the card holder will be moved to when they get access granted at this reader. Do not select “0”.
c. Exit Area:
This designates the next area that the card holder may enter. Do not select “0”.
- Click “OK” to save changes. (See Figure 6)
Figure 6 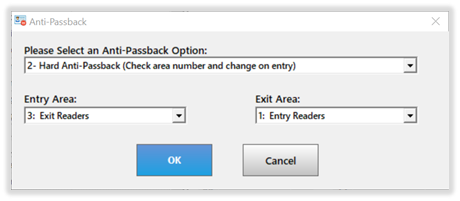
- You will be prompted to download changes, click “Yes”. (See Figure 7)
Figure 7 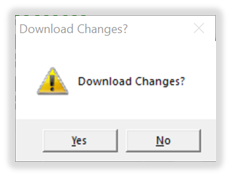
Configure all other readers using the instructions outlined above in steps 5 through 9.
Note: You MUST configure at least 2 readers.
II. Forgiving a Card holder in Passback violation
If option 2 “Hard Anti-Passback” option is configured and a card holder is getting “Access Denied: Passback”, that card holder’s record will need to be forgiven for access granted to be achieved. Depending on your hardware platform, please follow the instructions regarding the Aero platform or Mixed platform as appropriate. For a Aero platform: Note: This applies to sites using Aero hardware ONLY. If you are using other hardware, please go to “Mixed platform” section. Navigate to Personnel Manager. (This can be accomplished by clicking on the Access module and selecting “Personnel Manager”.)
- Unlock the module to allow for editing of the screen.
- Locate the card holder record.
- Once the card holder record has been located, click on the Advanced Access tab.
- Click on the “Reset Ant-Passback” button to reset Anti-Passback for the card holder.
- Click the “Save” button to finish.

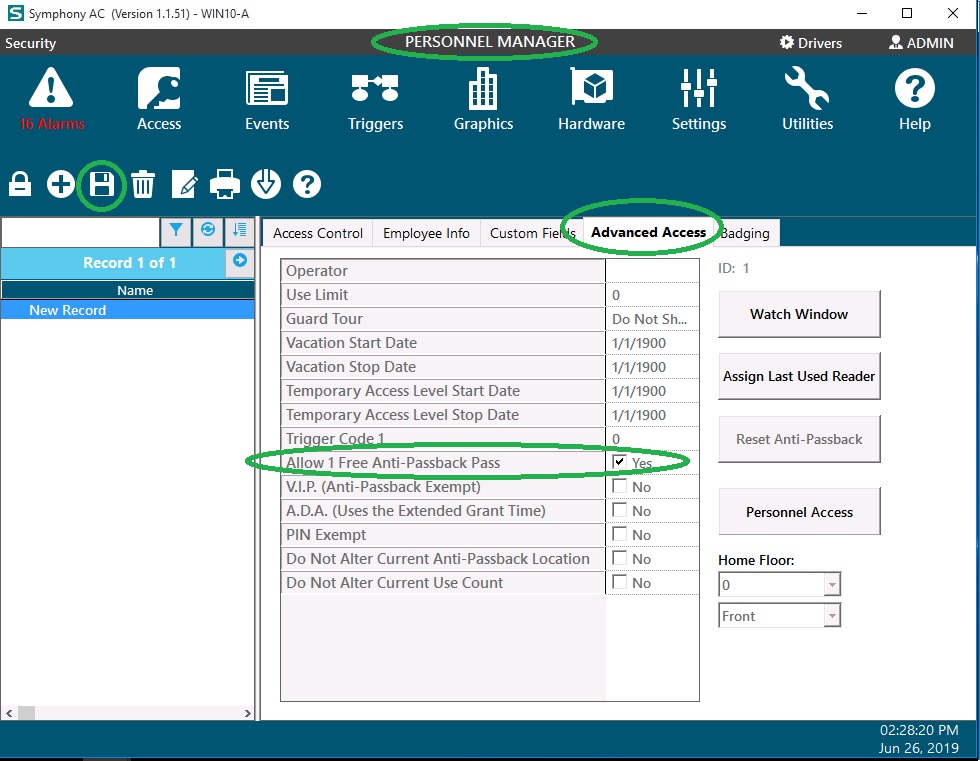
For a Mixed Platform (using Aero and other hardware): Navigate to Personnel Manager. (This can be accomplished by clicking on the Access module and selecting “Personnel Manager”.)
- Unlock the module to allow editing of the screen.
- Locate the card holder record.
- Once the card holder record has been located, click on the Advanced tab.
- Check the box labeled “Allow one free Anti-Passback” to forgive the card holder record.
Note: Global Anti-Passback is available using the same hardware platform. If the system is utilizing multiple hardware platforms, Anti-Passback will only be available between hardware of the same type.