Each video analytic may have slightly different configuration options; however; there are many commonalities:
• Masks: The Areas Where Symphony Tracks Objects
• Analysis FPS
• Perspective
Masks define where Symphony can track objects. By default, the entire scene is covered in the yellow mask, meaning everything in the field of view of the camera will be analyzed. Symphony has been designed to work well in dynamic outdoor environments. Rain or snow would not normally result in Symphony falsely tracking objects. However, in some cases, you may want to remove certain portions of the screen from analysis (such as a neighbor's property, or a swaying tree which is causing false alarms).
• Defines the area (in yellow) of the image where activity is detected
• Defines the area (in red) of the image where alarms will occur
• Cannot be greater than the Motion Mask
• Is bound by the Motion Mask
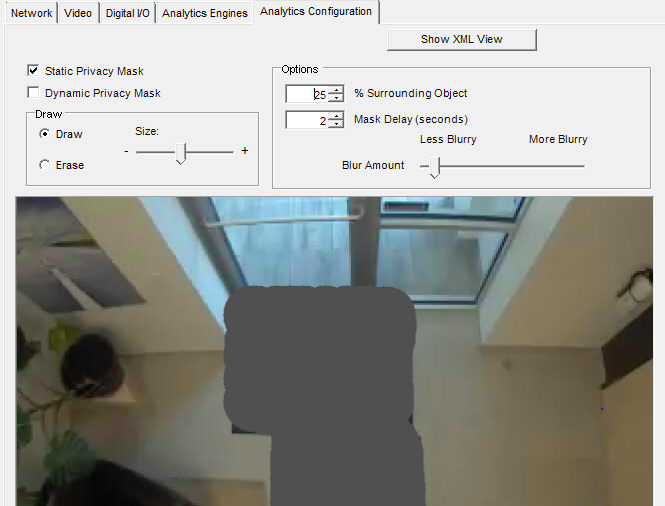
In Symphony analytics configuration, you can define dynamic and static privacy masks per device for cases where privacy is a concern.
• Static privacy masks blur the area of a drawn region for static areas such as entrance ways.
• Dynamic privacy masks dynamically blur motion tracking boxes for moving objects such as people walking.
Privacy masks can be configured for all motion tracking video analytics in Symphony. When privacy masks are defined, operators can validate alarms but cannot identify people in live or historical video. Privacy masks are transmitted with decorations in live and historical video streams with every key frame (or every eighth frame for MJPG). They are also saved to disk.
Privacy masks are permission-driven. Users denied the View Private Video permission will always see the privacy mask applied. System administrators granted the permission will never see applied privacy masks. |
Task 1: Configure Privacy Masks
To configure a privacy mask:
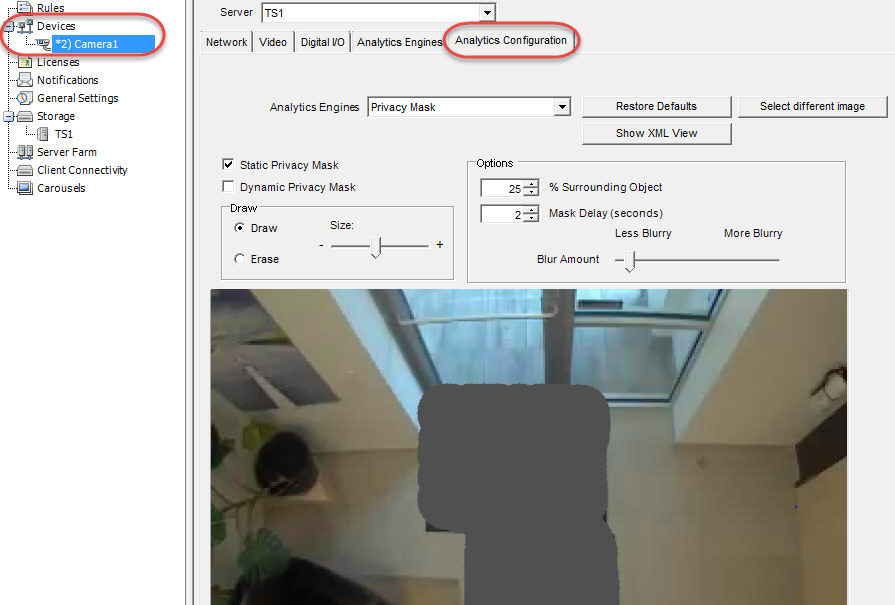
In Symphony Client, from the Server menu, select Configuration. The Configuration dialog box opens. This allows you to configure devices for the currently selected server.
In the left pane, click Devices. The Devices dialog box opens.
Click the camera you want to configure for use with video analytics and click Edit.
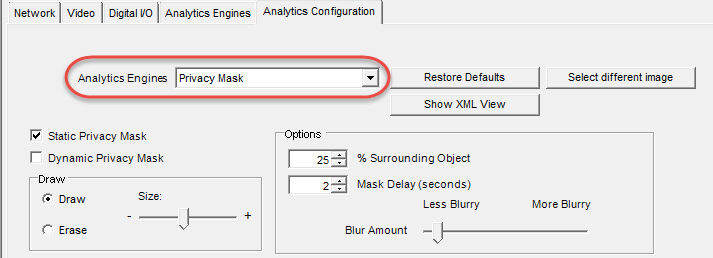
Click the Analytics Configuration tab.
Analytics Configuration Tab
From the Analytics Engines drop-down list, select Privacy Mask.
Privacy Masks Configuration
A current image from the video is displayed. If the image is not adequate, click Select different image. The Select Image dialog box opens. Select an image from the Timeline.
You can define an area in the image for a static privacy mask. Select the Static Privacy Mask check box.

Static Privacy Mask Configuration
Using the displayed image from the video, define the area in grey (the privacy mask) where objects in that defined area should be blurred.
Select the Erase option to erase the grey privacy mask.
Select the Draw option to draw the grey privacy mask.
The Size slider adjusts the pen thickness.
You can blur motion tracking boxes for moving objects as they are tracked by the analytic. Select the Dynamic Privacy Mask check box.

Dynamic Privacy Mask Configuration
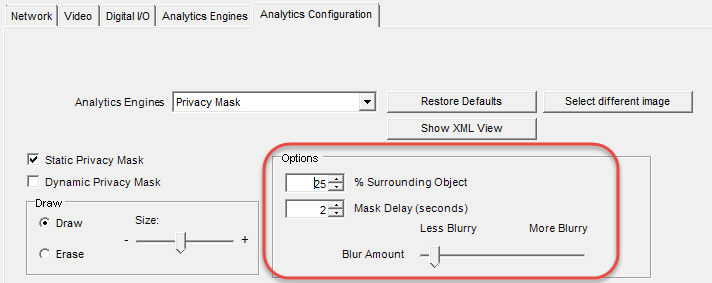
Customize
the privacy mask as follows:
%
Surrounding Object – the percentage of the area the privacy
blur is applied to beyond the tracking box. Applies only to dynamic
privacy masks.
Mask
Delay (seconds)
–
the number of seconds to remember the position of tracked objects
and continue blurring their previous position. Applies only
to dynamic privacy masks.
Blur
Amount
–
the amount of blur applied to the area. Applies to both static and
dynamic privacy masks.
6 Click OK to save settings.
Analysis FPS allows you to modify the frames per second (FPS) that the analytic should analyze. Normally this field should be left at the default value.
It is possible to record at a higher frame rate than what is analyzed by the analytic engine, to reduce CPU use. |
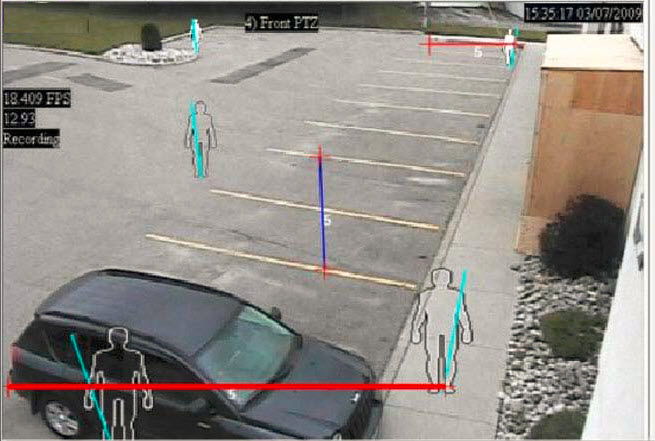
For certain video analytics, perspective information must be entered for proper functionality. For example, for Outdoor Tracking, perspective is established by using 3 lines at different distances in an image. Note how the size of people are adjusted for distance (foreground versus background).
The two red horizontal lines and the one vertical blue line in the image should closely represent distance at those positions in the image. The units (meters, feet) are irrelevant. The key is that in the distance, say 5 feet, is represented by a short line, while 5 feet in the foreground of the image is represented by a longer line, because of perspective. People and cars closer to our eyes appear bigger than people and cars in the distance. The figures standing on the red lines should closely match the size of a person at those positions.