|
Article Type:
|
How To
|
|
Product:
|
Embedded Outdoor Object Tracker
|
|
Product Version:
|
|
|
Component:
|
|
|
Device Brands:
|
|
|
Created:
|
6-May-2015 12:21:45 PM
|
|
Last Updated:
|
|
How to Integrate Senstar Outdoor Object Tracker and exacqVision VMS using TCP
Camera Requirements - Camera Manufacturer: Axis
- Chipset: ARTPEC-4 or higher
- Firmware Version: 5.60 or higher
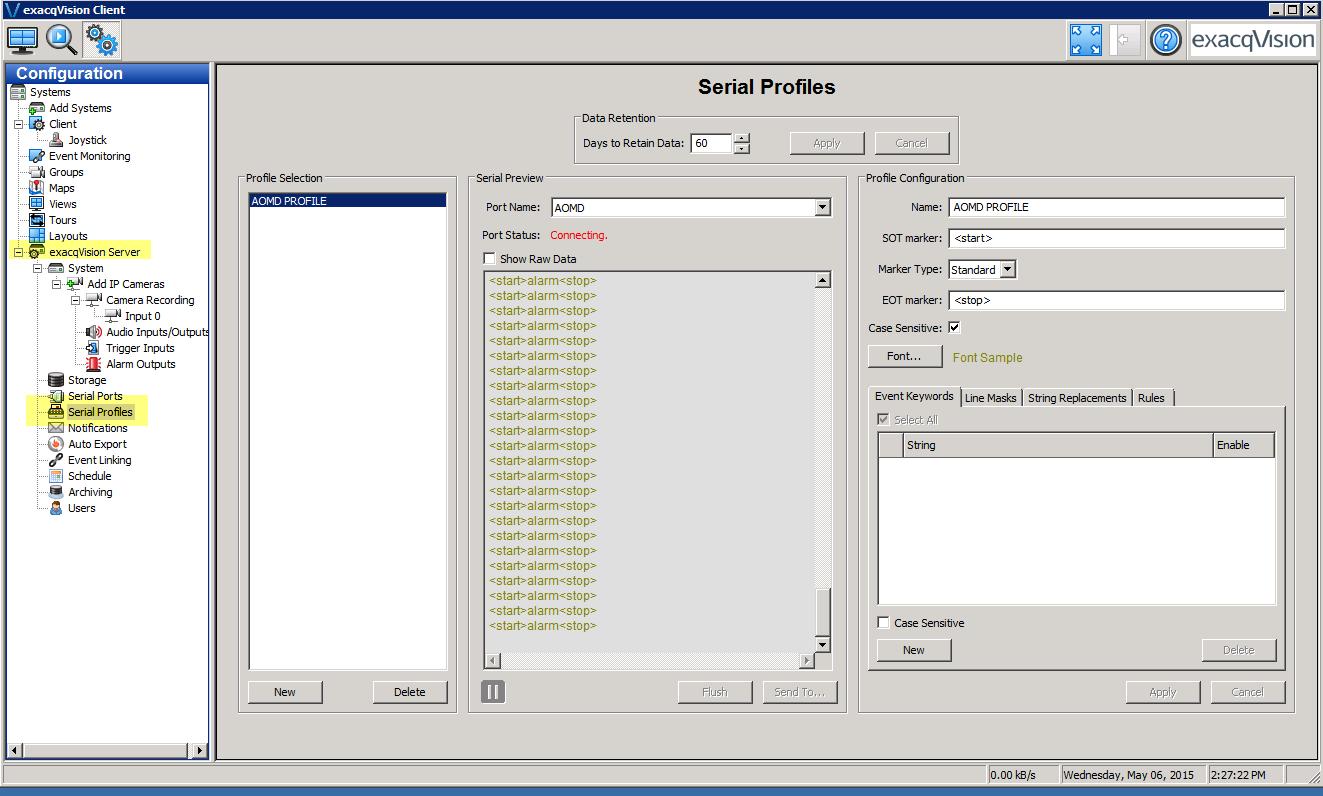
Task 1: Set up rule in Senstar Outdoor Object Tracker. See instructions in the Outdoor Object Tracker guide. Task 2: Set up exacqVision Set up the Serial Profile - In the exacqVision Client, go to Configuration>exacqVision Server>Serial Profiles.
- Click New.
- Enter a Profile Configuration Name, SOT marker (<start>), Marker Type (Standard), EOT marker (<stop>). (SOT and EOT markers are optional and could be helpful when searching for a specific event in the exacqVision Client.)
- Click Apply. The Port Name will be visible once you set up the Serial Ports.
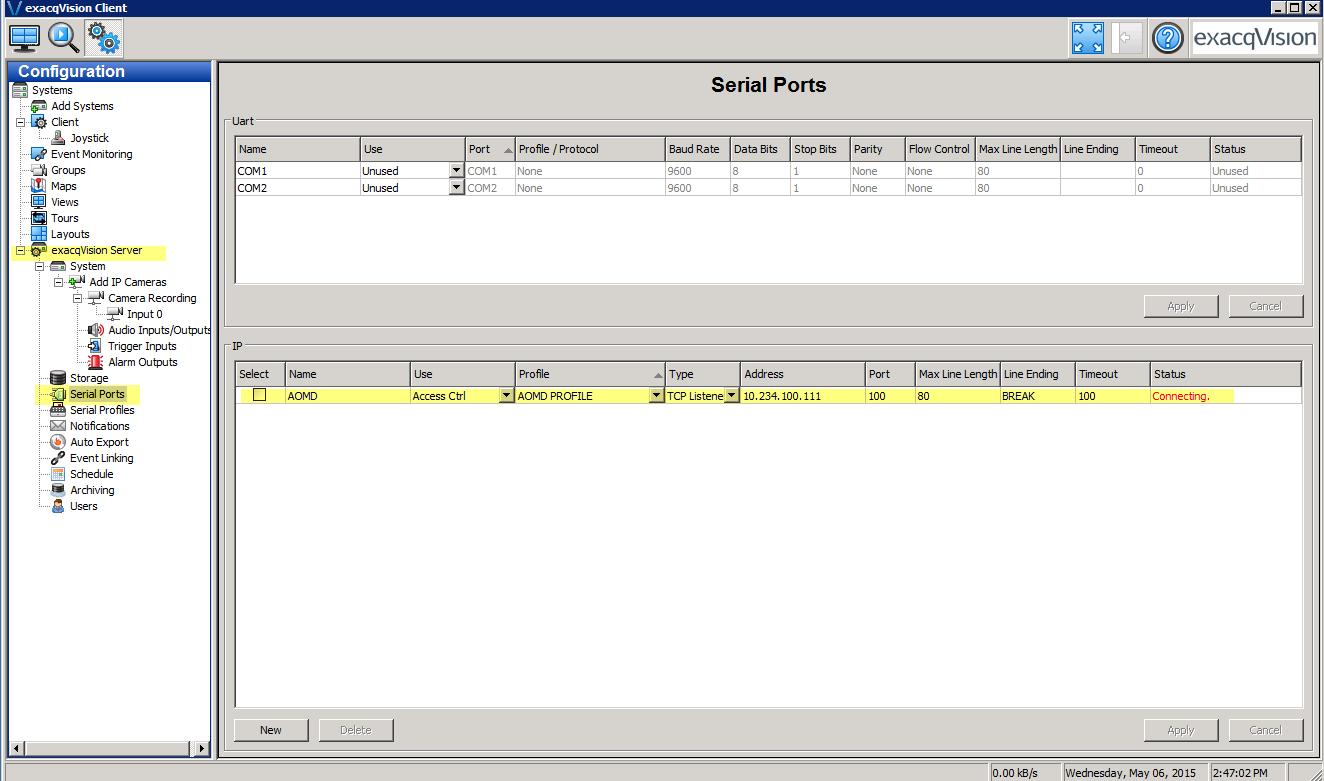
Set up the Serial Port - In the exacqVision Client, go to Configuration>exacqVision Server>Serial Ports.
- Click New.
- Enter the name of the port.
- Under Use, select one of Accessed controlled, Point of Sale, ATM, or unused.
- Select a new or existing profile.
- For Type, select TCP Listener and enter the IP address of the camera and port (you can use any available port).
- For Line Ending enter BREAK, Max Line Length of 80 and a Timeout of 100.
- Click Apply.
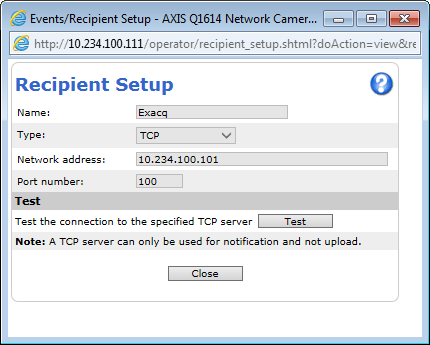
Task 3: Set up the Axis Camera Set up Recipient - In the Axis camera website, go Setup.
- Go to Events and select Recipients.
- Select Add...
- The recipient must be the exacqVision server IP and the port must match the port used Task 2 step 6.
- Complete the Name, Type (TCP), Network address (address of exacq server), and Port number (any unused port but must be same as what you have entered for the exact server).
- Click OK to save the information. The recipient will be displayed in the Recipients list. You will need the Network address you entered again.
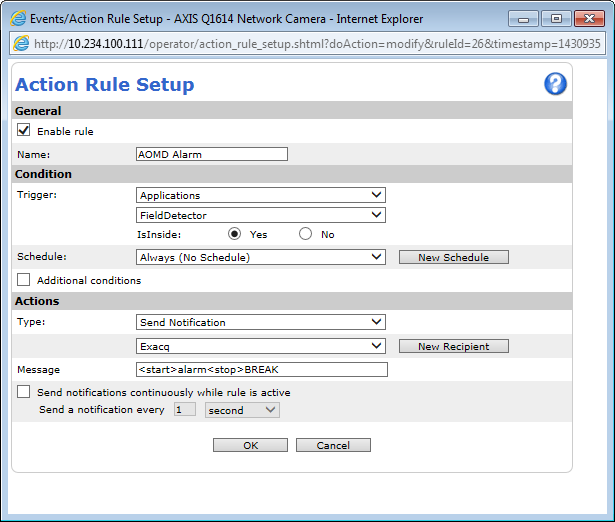
Set up Action Rules - Goto Events and select Action Rules.
- Select Add...
- In the Action Rule Setup screen, select Enable rule and enter a name for your rule.
- For Trigger, select Applications and FieldDetector.
- Ensure that the IsInside option is set to Yes.
- For Type, select Send Notification.
- Select the exacqVision recipient you created.
- For Message, enter your alarm message. For example: <start>alarm<stop>BREAK
where BREAK denotes a line break. (Required because of a known bug in Exacq.) - Click OK.
|
Average rating:
|
|
|
|
Please log in to rate.
|
|
Rated by 2, Viewed by 5996
|
|