|
Article Type:
|
How To
|
|
Product:
|
Symphony
|
|
Product Version:
|
|
|
Component:
|
Symphony Server
|
|
Device Brands:
|
|
|
Created:
|
18-Oct-2011 9:34:35 AM
|
|
Last Updated:
|
|
How to configure ADAM I/O devices for use with Senstar Symphony
Task 1 - Visit the Supported Video Devices webpage (https://xnet.senstar.com/Xnet/Downloads/DeviceList.aspx) to verify which Advantech I/O devices are supported in Senstar Symphony.
- If the Windows firewall is enabled on the Symphony Server:
- Configure the firewall to allow incoming traffic on port 502 (TCP). The ADAM I/O device sends messages to Symphony, rather than Symphony continuously polling the device for its status.
- When configuring an ADAM-6066 I/O device, configure the firewall to allow traffic on data stream port 5168 to ensure bi-directional communcation between Symphony and the device.
- Install the ADAM .Net Utility that was included in the CD, which shipped with the device. This utility can be installed on any PC that can connect to the IP of the Adam I/O device.
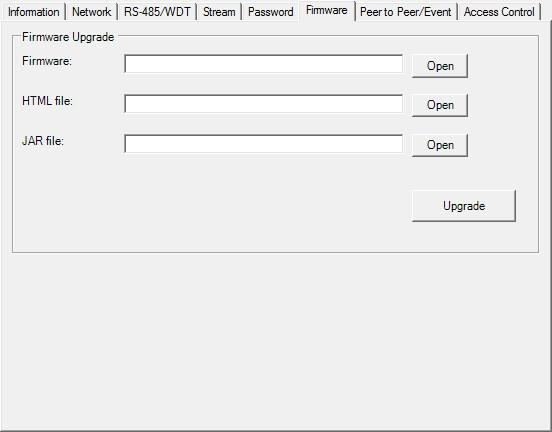
- Ensure that the firmware is 4.09 or newer. Upgrade if necessary by clicking on the Firmware tab.
 Important:
The ADAM-6066 I/O device includes an option to change the data stream port on the Network tab. This UDP port is used to broadcast data to Symphony, and Symphony requires this port to be set to the default value of 5168. Do not modify this value. This option is not applicable via the ADAM-6060. - Configure the Adam device to send Symphony messages.
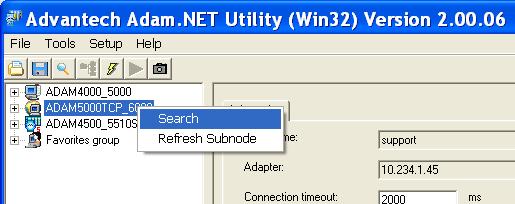
- Right-click on the ethernet adapter that will have connectivity to the Adam device and click Search. This will scan the network for connected ADAM devices.
 - Click on the device that was found and select the Network tab to modify the IP address of the device.
- Click the Stream tab. Enter the IP address of the Symphony server(s) that should receive messages from the Adam device. In the example below, the device will send messages to 5 Symphony servers. In most cases only 1 server is defined.
Important:
In cases where the server has more than one network card (with or without a fixed IP address), only one (1) network card should be enabled so that only a single IP address is registered with the ADAM device. Disable any other network cards to prevent device communication issues. 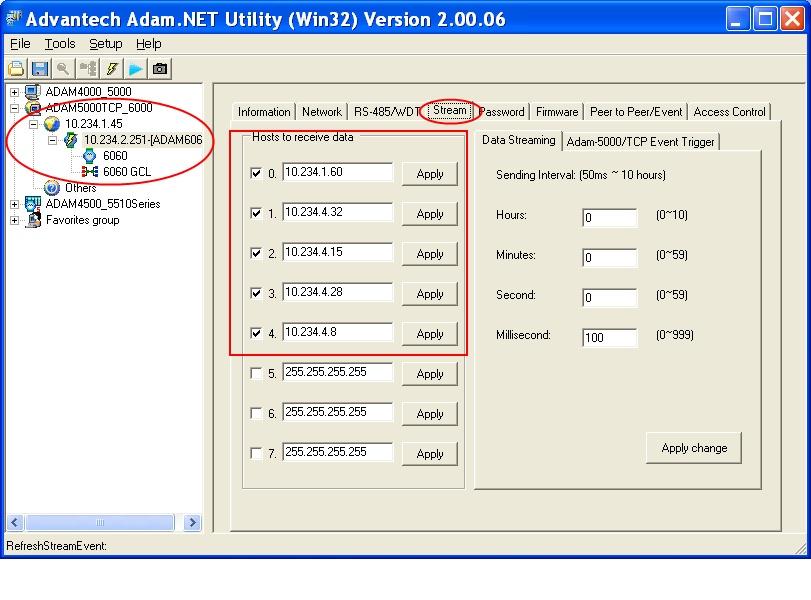 - Click Apply for every host that is enabled to save changes.
Task 2: Add Adam to Symphony - Start Symphony Client.
- From the Server menu, select Configuration. The Server Configuration dialog box opens.
- Select Devices.
- Click the arrow in the New button and select Add a Hardware Device.
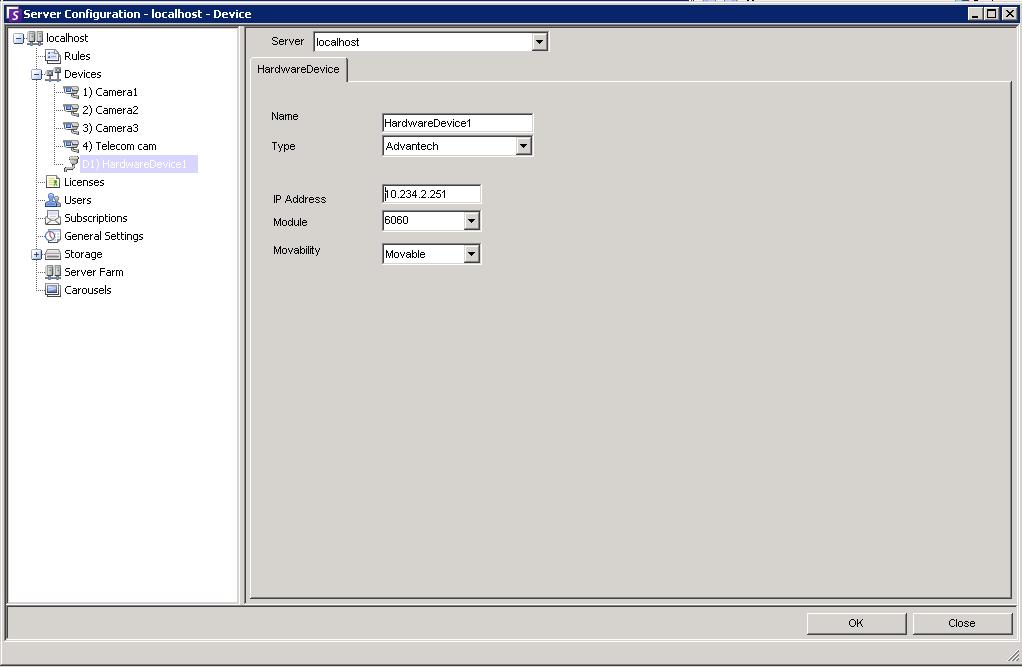
Important: More than one IO device can be added to Symphony. If more inputs or outputs are required than what is physically available on the device itself, simply add multiple devices to Symphony 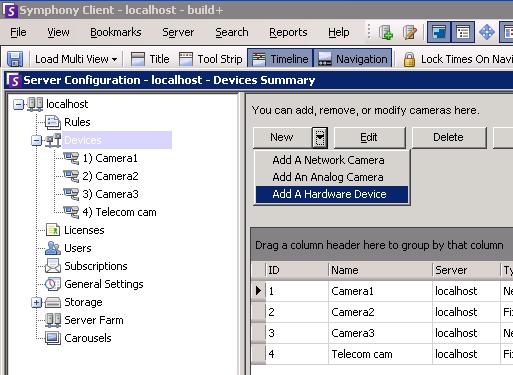 - On the Hardware Device screen, enter a descriptive name (user definable) in the Name field.
- In the Type field, select Advantech.
- In the IP address field enter the IP address of the device.
- In the Module field, select the Advantech model (the most common is 6060)
- If a server farm is used, select Moveable to have the device automatically failover to a redundant server.
- When finished, the dialog should look similar to the image below. Click OK to save changes.
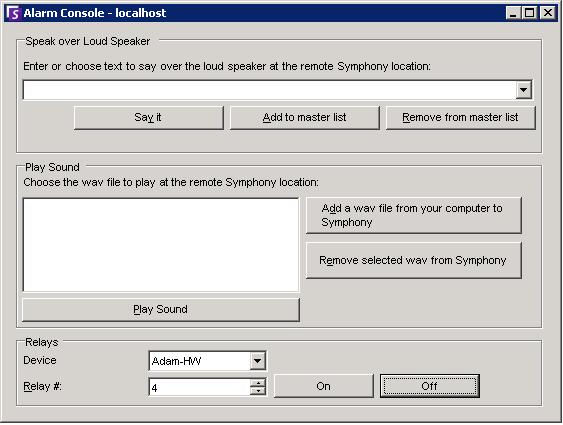
Optional: To Test functionality, open the Alarm Console from Symphony Client. - From the Server menu, select Alarm Console. The Alarm Console dialog box opens.
- In the Device field, select the Adam device and click ON/OFF. You should hear a click from device and/or see the state change from Adam utility.
Task 3: Configure Rules with Adam The Adam I/O device can be used as both an input (trigger) for an alarm, as well as an output (action) after an alarm has occurred. The following example demonstrates how to create a rule that triggers from a closed relay (by wiring a switch to output 1) and as an action will trigger an I/O output (which will be wired to a LED). Input will be port 1, output will be port 2 on the Adam device. Important: Symphony must have at least one camera device set up in order to configure a rule to trigger an I/O output via the Adam device. - In Symphony Client, from Server menu, select Configuration. The Server Configuration dialog box opens.
- Click Rules.
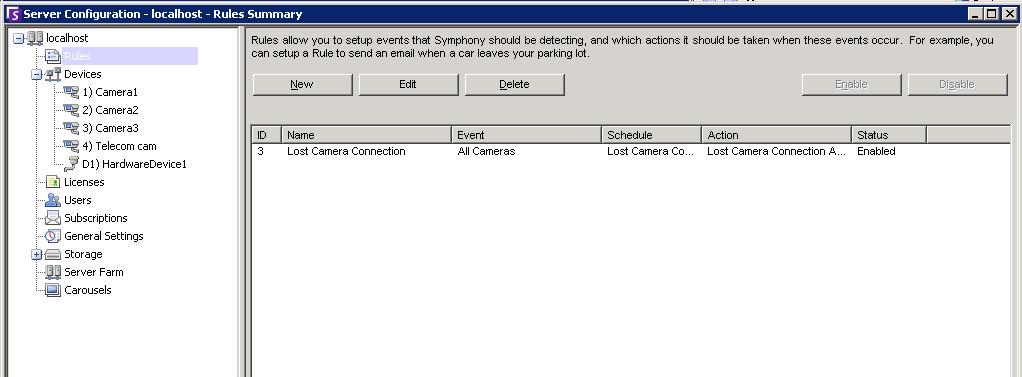 - Click New to start the Rule Wizard
- In the Events page, select your I/O device from the I/O and Camera motion detection tree.
- Select the check box beside your device.
- Select input option that will trigger this rule. In this example, Input Number 1 has been selected.
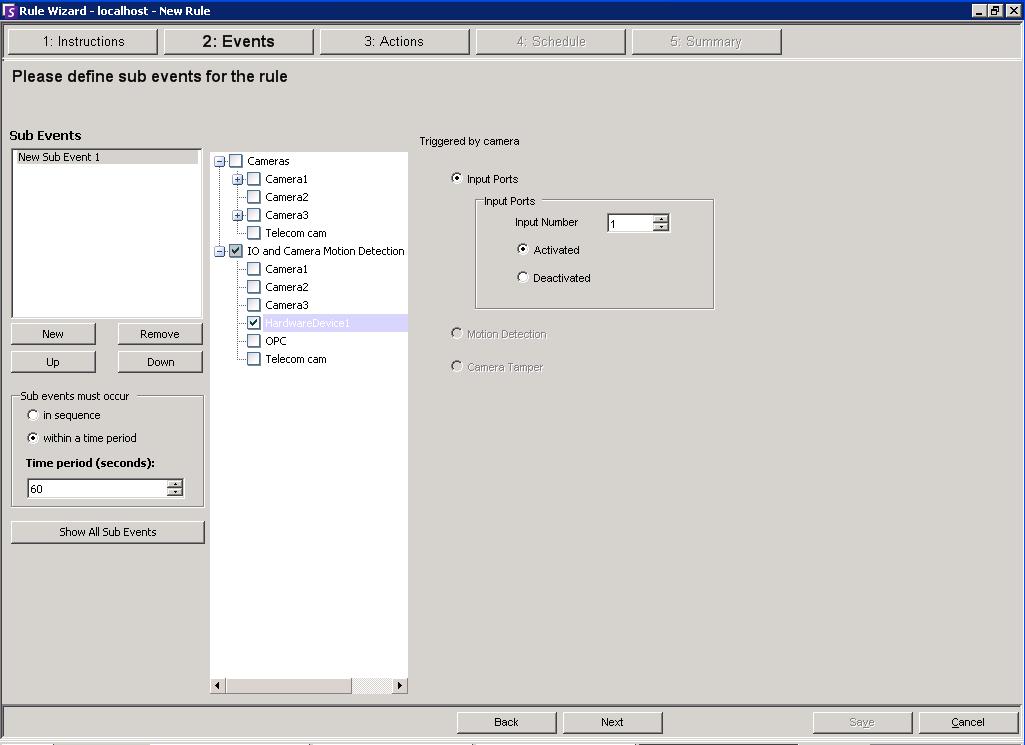 - Click Next.The Actions page opens with the Alarm tab active.
- From the Choose camera drop-down list, select the camera that you want to display the alarm on.
- Click the Relay tab.
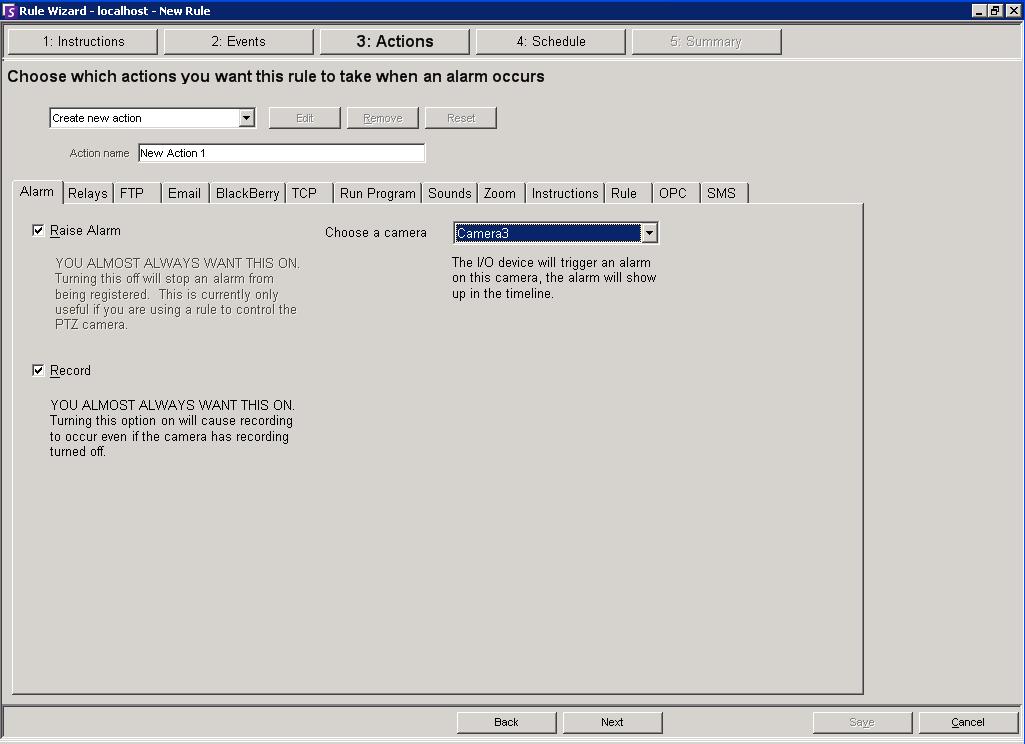 - On the Relays tab, select the I/O device from the list.
- Choose what action the output will cause. In this example, we will trigger output 2 on alarm and then restore the default relay state after 1 second.
- Select Turn Relay On option, and define the relay that we are going to use in the Relay # field.
- Select the Restore state after option and enter 1000ms (1 second).
- Click Next. The Schedule page opens.
- Define the schedule for the Rule and click OK.
Summary: In the example, we trigger a rule by closing the relay on input 1 by clicking the switch, and on alarm Symphony will turn on a light for 1 second and then turn it off. Troubleshooting - If some rules are not being triggered reliably by the I/O device, verify the device itself is functioning proplery by using the Adam .NET utility and manually turning on and off inputs and outputs.
- Check if the Tracker service is running (run services.msc), if not try restarting tracker's service.
- By default Symphony will only allow a maximum of 3 alarms per minute per camera. If you see only 2 to 3 alarms per minute and expect to see more, then modify the ThrottleMax value accordingly. For instructions, see KB Article 10037.
|
Average rating:
|
|
|
|
Please log in to rate.
|
|
Rated by 6, Viewed by 18494
|
|